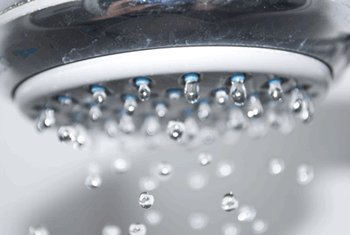
Fixing Low Water Pressure from a Shower Head
June 9, 2013 2:33 pm Leave your thoughts Over the last couple of days, I’ve noticed that my shower’s water pressure has dropped to around half of how it normally flows. I spent the week procrastinating and finally fixed it this weekend. A large chunk of what appeared to be rubber was blocking the little openings on the inside of the shower head. Needless to say, removing the shower head and clearing out the debris quickly resolved the issue. Now, I have even better pressure than before this problem arose. While my shower head was removed I also took the opportunity to thoroughly clean and polish it up. Now it’s looking good and working better than it ever has before. Here’s how I did it:
You may need a couple of things to get this project going:
- A wrench
- Plumber’s tape (pipe thread tape)
- A new shower head (if you’re replacing the old one as opposed to cleaning it)
- Limeaway or CLR for calcium build up
- A scrubbing pad
- Time (about 15-30 minutes depending on how dirty your current shower head is)
- Ensure the water is in fact “off”.
This may sound obvious, but we might as well cover all of our bases. Generally, just turning the water off using the handles that control your shower will suffice. - Remove the shower head.
I like to first see if I can use my hand to twist and remove the head before grabbing tools. Holding the shower arm (pipe coming from the wall) with one hand, twist the shower head counter-clockwise with the other. If it doesn’t come off with a good firm twist, find yourself a wrench. Shower heads usually have a slight notch on the base, where it attaches to the shower arm, that make it easy for a wrench to grab onto. I like to wrap a towel around where the wrench comes into contact with the base to avoid scratching or marring the finish. - Clean it out.
After it’s removed, take a good look inside of the shower head. Check for anything that could be blocking the flow of water. Sediment from the water heater that has managed to make its way out can build up over time at water spouts. In one case, I found a wad of plumbers tape that had untangled and became lodged in the shower head. Clean out the old plumber’s tape from the threads before adding new tape. - Check your pressure.
Without the shower head attached, turn on the water and let it flow out of the exposed shower arm. Is the pressure still low? If so, it may be a bigger problem than a clogged head. - Clean the front.
Calcium and lime can build up from hard water on the front of the shower head. Grab yourself a bottle of Limeaway or CLR and soak the head for enough time to break up the calcium. You may need to soak it more than once and manually scrub or brush the head to remove all of the build up. I like to use green Scotch-Brite scrub pads that you can find in the cleaning section at almost any store. - Prepare the shower arm.
Using plumber’s tape wrap the threads on the shower arm, but be careful not to allow any of the tape to hang loose over the end of the spout. Remember that you’ll be twisting the head back on in clockwise manner. A good idea would be to wrap the tape in the direction that you’ll be turning the head, so it doesn’t get mangled and bunched up while you’re twisting. - Reattach the shower head.
Begin twisting the shower head back onto the shower arm using only your hand. Try to get it as tight as possible by hand. At this point I like to take the wrench and turn it a quarter to half a turn around to ensure it makes a snug leak-free fit. Be careful not to over tighten the shower head as you can quickly turn a small project into a much larger one if you damage your shower arm.
Categorised in: Bathroom, Cleaning, Repair, Tips and Tricks
This post was written by HDG
